Answer
Windows being a GUI, gives better flexibility and easier to use for file management. Using the File Manager feature of Windows, one can easily copies, move, delete, rename files and also create and remove directory. This avoids the painful task of remembering all the file management DOS commands.
Windows can run two types of applications, standard DOS based applications and Windows based applications. DOS based applications are standard DOS programs such as WordStar, dBase etc. developed to run in DOS environment, and not specifically meant for windows. Whereas a windows application is specifically developed to run under Windows environment which support GUI.
Directory and File Management in Windows
Windows provides File manager for manipulating Directory and Files of a system. It is an essential part of Windows and run like any other windows program. Main program consists the icon for File Manager. Double clicking on the File Manger icon activates it from the Main program group. Other way of activating it is to highlight the File Manager icon and hit the Return key
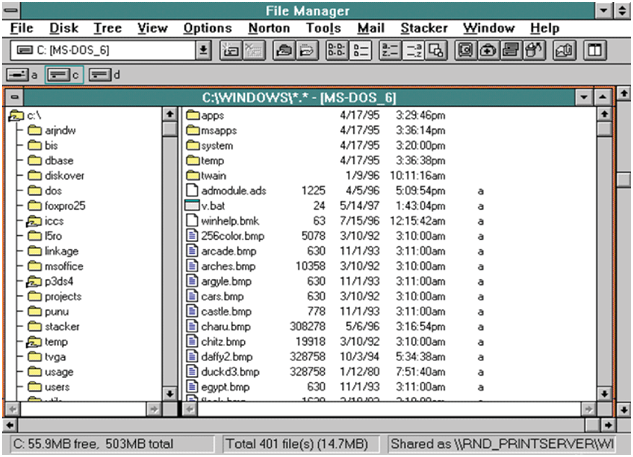
File Manager can be closed like any other windows program. File Manager can be minimized while running some other application and expanded once the execution is over. The total amount of disk space, free disk space available, the size of the selected file is shown for the currently open directory on the status bar, which appears at the bottom of the File Manager.
- Drive Window : Currently selected drive is displayed as other windows within the File Manager window. The command to resize, move or minimize is same as that of any other window. The only difference is that it is divided in two parts; right one displays the directory structure of the currently selected drive and the left part displays the contents (such as files, sub-directory etc.) of the currently selected directory.
- Directory Operations: File Manager provides the features to manage all the drives in your system and/or connected to your system through network. It allows copying, moving or deleting files within a drive, between drives of the system and systems connected through network. Once the drive is changed, directory and files under the newly selected drive will be displayed in the current directory window.
- Changing Disk Drives: To change drive, click on the desired drive icon or press <CTRL> and the designated drive letter such as C, D E etc. Other way of selecting a drive is to click on the Disk option of the File Manager menu bar, and select the desired drive letter.
- Creating a New Directory: A new directory or sub-directory under an already existing directory can be created using File Manager. First click on the File menu option of the File Manager. This will bring up the pull down menu having Create Directory. Selecting this option will activate the Create
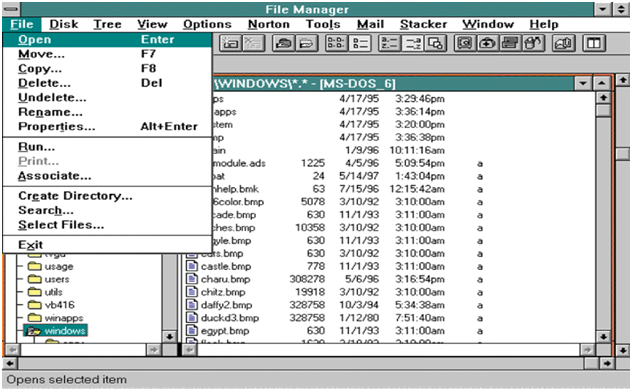
Directory dialog box with current directory path. To create a sub directory under the current directory, type down the new sub-directory name in the text box. To create a sub-directory under some other directory, type the entire path in the name text box. To finish the entry and create the new sub- directory, click on the OK button.
Changing Directory: To go to the desired directory under the currently selected drive, double click on the directory name. This will make the selected directory as the currently active directory and all the sub-directory and files under this directory will be displayed at the right pane of the document window.
File manager has the flexibility of displaying different groups of files in the currently selected directory. Click on the View option of the File Manager menu bar, which will activate the pull-down menu with option ‘By File Type’. Selecting this will bring up the ‘By File Type’ dialog box. Use the wild card characters to enter in the name text box, the desired file type you want to see.
In File Manager, it can also be specified what all information for files can be displayed. In addition to the File name, File path one can display file size, date and time it was created/or last modified etc. To display all file information, select the VIEW option on the File Manager menu bar and activate the option ‘All File Details’. In File Manager, sub-directory and file under the currently selected directory are displayed in alphabetical order. However they can also be displayed in order of file type, date or file size. To change the displays option, select the VIEW option on the menu bar and selected the desired option. Available options are:
- Sort by Name: Displays all files in alphabetical order of File name.
- Sort by Type: Displays all files in alphabetical order of extension Name
- Sort by Date: Displays File in order of creation/last modification Date.
- Sort by Size: Display all files in order of File Size.
File Operations
File Manager provides tools such as copy, rename, move, rename for management of files within directory, between directories and also between drives.
Copying/Moving Directory or Files
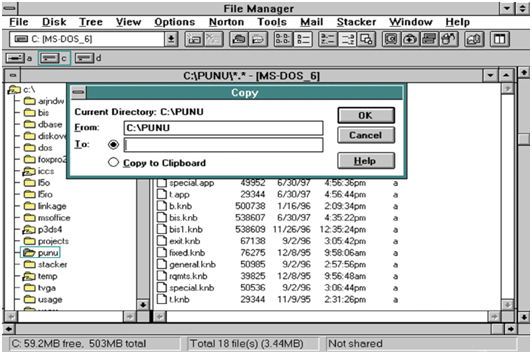
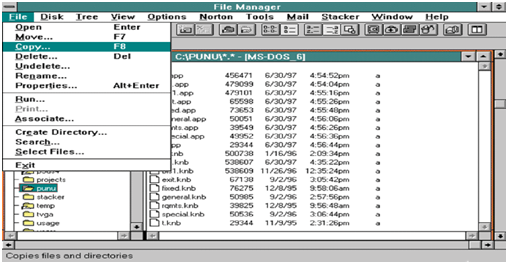
In file Manager, one or more files or Directory can be copied or moved into different location using two different methods; Drag-and-Drop method and Keyboard method.
- Drag-and-Drop Method: File Manager has the capabilities of copying or moving files and directories in more interactive and visual ways as compared to MS-DOS. Open the source directory select the files to be copied and then drag them in to the desired target directory, another drive icon, another directory window or to a file list in a different directory window and drop them.
Confirm the copying operation, by clicking on the OK button of the dialog box. This will copy the selected files in to the target drive. If the file(s) to be copied is/are already presents on the destination directory or drive, confirm replace message by clicking on the YES button of the dialog box.
Deleting Files and Directories
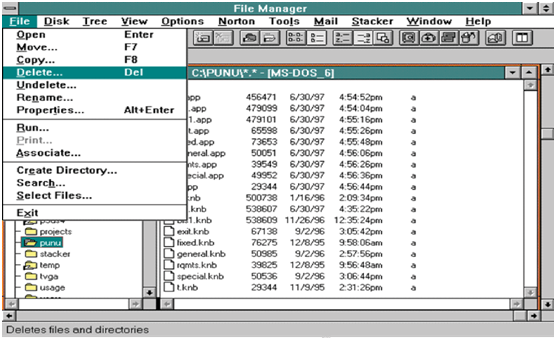
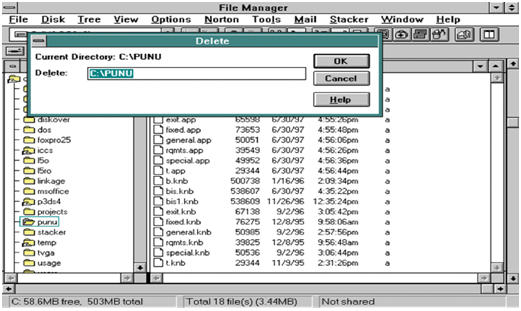
Select the file(s) or directory to be deleted (alternatively use tab to move the cursor to the desired location and use direction keys to select the files). Activate the Delete option from the File menu bar of File Manager and the delete dialog box appears on the window desktop. To delete the already select files or directory, click on the OK button. To delete other files or directory, enter the file name or path and click on the OK button.
This will activate directory delete dialog box. Click on YES button to confirm the deletion. Click on Yes to All to delete all selected files or click on Cancel button to cancel the delete operation.
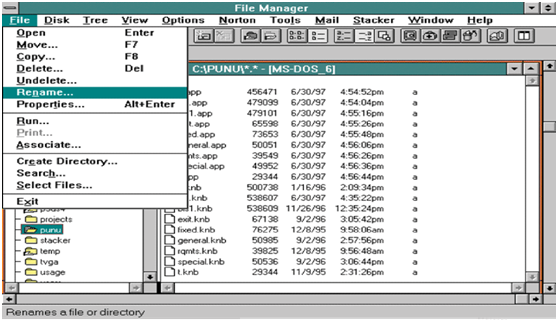
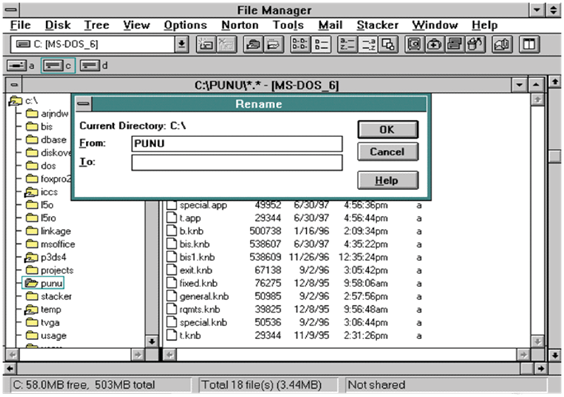
File Renaming
Searching for Files and Directories
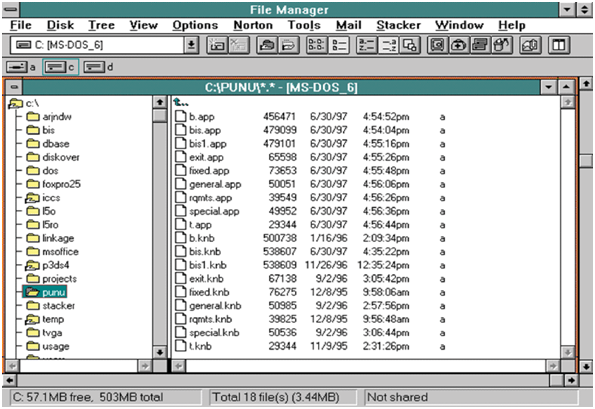
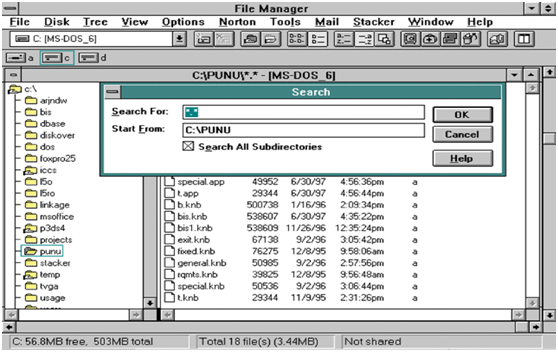
File Manager provides the tool to search a file, a group of files or subdirectories. This is particularly helpful, if you know a particular file is on your disk, but you don’t remember where the file exists. Here you can conduct a search on your disk, directory to locate the file. The result is displayed in Search Result window, which can be resized, minimized or maximized, closed the same way as other window.
